How to Paint an Easy Mountain Landscape Mural
You don’t need to be an artist to paint a beautiful mountain landscape mural. Creating this hand-painted mural only requires a brush and some paint, and most importantly, a creative mindset! We will guide you step-by-step how to create a mountain landscape mural that will add a completely unique look to any bedroom.
Project Overview:
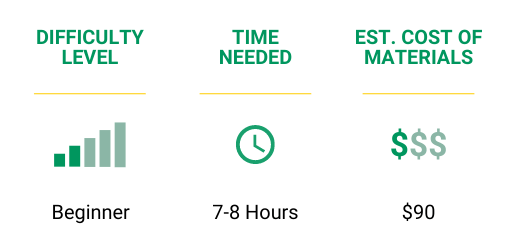
Note: The time-commitment, cost, and materials represents painting a 10' x 8' mural. This tutorial is only meant to act as a guide and may vary based on individual skill level.
Tools:
-
$10.49
- Ready to Ship
- 19 Available for pick up at
-
$5.99
- Ready to Ship
- 17 Available for pick up at
-
 Shur Tech BrandsFrogTape 0.94" x 60 yd Green Paint Tape$11.99
- Ready to Ship
- 12 Available for pick up at
-
 Canadian Technical TapePaintPro 36 mm x 55 m Green 10 Day Masking Tape$4.27
- Ready to Ship
- 112 Available for pick up at
-
$18.89
- Ready to Ship
- 59 Available for pick up at
-
Starting at$12.40
-
Starting at$5.20
-
Starting at$1.60Regular Price$6.40
-
Starting at$3.80Regular Price$15.20


How to Paint an Easy Mountain Landscape Mural
1
Painting the Sky
To start off, you will need to paint what will essentially be the sky behind your mountain landscape. We chose to use PPG’s Delicate White for ours, but you can use any colour you want. We started to paint the wall about a quarter of the way up because that is where we will be starting to paint our landscape.
This is where you are going to want to start painting mountain shapes. Using your white paint, create mountain peaks by making triangular shapes across the wall. Be sure to paint the wall all the way up from your peaks. Keep stepping back from the wall to see if you like the flow of your mountains. You can go over the parts you don’t like with white paint to change the look. Once you are happy with how your mountain peaks look, you can move on to the next layer.
2
Painting the First Set of Mountains
To paint the first set of mountains, we mixed in SICO’s Jazz Night into our white paint. Before you mix in another colour, be sure to save some white paint for adding details later on. Once you have your colour mixed, you can go ahead and paint your first set of mountains.
Using your white paint as a guide, paint triangular shapes to make your mountain landscape. You’ll want to paint about 2-3 feet down from the peaks. While your paint is still wet, use some of the white paint you set aside to create fog at the base of the mountains. To do this, apply some white paint at the bottom of your mountains and blend it upwards. This will give your landscape some depth and create a more realistic look.
Using the same brush, you can also blend some white into the peaks of your mountains to create a snow-capped look. Don’t worry if some of the paint spills over the edges, you can clean it up after.
3
Painting the Second Set of Mountains
Now we are going to paint our second set of mountains. Be sure to set aside some of the darker paint you mixed for the first set of mountains, in case you need to do any touch ups later on. This time you will be mixing more of the darker paint into the white to create a darker mountain range.
Repeat the same process you did with the first set of mountains but be sure to make your mountain peaks different than the first layer – this will add dimension to your mountains. You can also add fog and snow caps to this set of mountains as well.
TIP
Step back and take a look at the flow of your mountains to see if you’re happy with it. Since you have the paint colours set aside, you can make the mountains taller or make the valleys deeper.
4
Painting the Last Two Sets of Mountains
For the last two sets of mountains, we mixed in more Jazz Night into our mixed grey from step 3 to give them a deeper colour. Repeat the steps above for your last two sets of mountains. Once you are done with your last set of mountains, extend the paint colour all the way down to the bottom of your wall. Now your wall should be entirely covered with paint.

5
Cleaning Up Your Mountains
While your bottom set of mountains dry, you can start cleaning up the first 2 sets of mountains. You can either do this freehand or use painter's tape to get nice, straight lines. You can also add some clouds to your landscape using a little bit of white paint on your brush. Dab your brush almost as if it were a sponge to get natural-looking clouds.
You can play around with the dimension and paint some clouds as if they are behind the mountains, and some in front of them. There is no rhyme or reason to this method, this is where you can get creative!
6
Adding the Final Touches
Now you are going to want to paint some trees at the bottom of your landscape. We used Black Magic by PPG for our trees, because we want them as dark as possible. First, start with a thin line of paint down to the baseboard. Then, using the end of your brush, paint little arrowheads all the way down the line to create the look of a tree. All trees look different in real life, so your trees should be the same! You can vary the style of all your trees with gaps and longer branches to get a more natural look. We also added small trees to the valleys of the last set of mountains.
Once you have your mural painted, you can use a sponge with some white paint to add larger clouds to your landscape. If there are any parts of your mural you think could benefit from a little bit more, you can add clouds to give it more dimension.
If you’re looking for another paint project to do this weekend, check out our guide on How to Make an Accent Wall With Trim, and you can read our Paint Buying Guide to find the perfect paint for your project.
Looking for More DIY Projects?


Recommended Articles
-
There are hundreds of hues to choose from when it comes to painting, but your paint choice includes so much more than the colour! The type of paint best suited for your project should first depend on its formula and durability, then its finish best suited to different spaces, and third, any special requirements for craft paints, spray paint, or furniture paint. For smaller creative projects & DIYs, there is a rainbow of options and finishes like chalk or metallic you won’t find in wall paint choices. No matter where or what you’re painting, our Paint Buying Guide and KENT experts can help you find the right paint for the job!
-
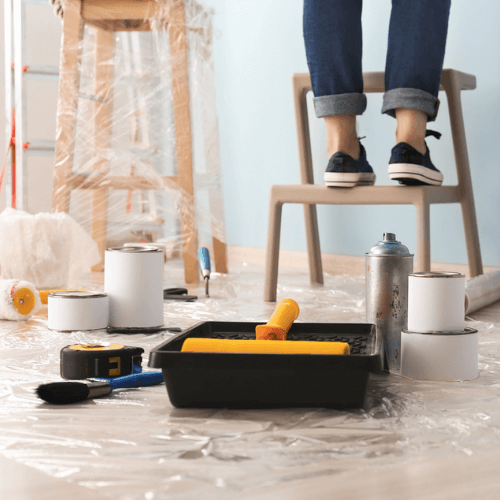
Spending time indoors doesn’t have to leave you feeling cooped up when you have a beautiful space to enjoy! This fall, tackle the bottom of your to-do list to make your wasted space functional and inviting. Finish or refinish your basement, office, or bedroom and ditch your drab rooms with some easy DIYs!
-
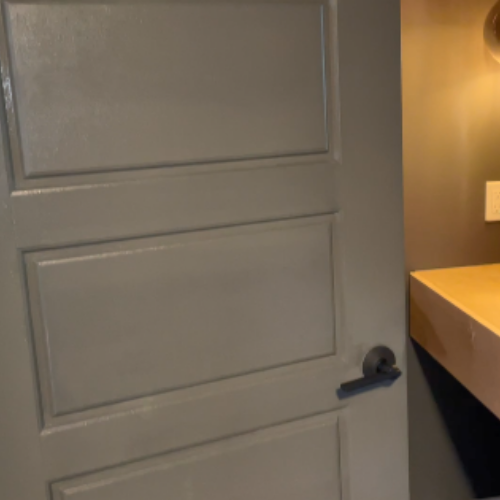
A freshly painted door can add a nice touch and compliment your home’s existing décor. It’s amazing how a new coat of paint can make such a difference! Here’s how to paint an interior door like a pro with a few painting tips and tricks to help you get a smooth and blemish-free finish.
-
Start your project off on the right stroke with the proper tools and techniques for a perfect paint job! The KENT Paint Department can help you achieve a flawless finish no matter what your painting experience or project may be.