How to Install Vertical Shiplap
Shiplap is famous for giving homes that traditional farmhouse look, but when it’s installed vertically, it can give your space a very modern feel. In this DIY, we paired it with a chair rail, so it only goes about 1/3 of the way up the wall. Not only does this add interest, it also provides separation to the wall that may otherwise seem overwhelming. Grab your tools and your boards, and follow along step-by-step to learn how you can install vertical shiplap.
For This Project You Will Need:
1
Remove Your Baseboards
Before you start, you may want to remove your baseboards to install your vertical shiplap, because it will create a seamless transition from the shiplap to the baseboards.
To do this, use a utility knife to score the caulk where the top of the baseboard meets the wall, and wherever you see caulking. Use a pry bar and chisel to carefully pull the baseboard from the wall. It’s important to exercise care when you are removing them, as they can be re-used.

2
Install a Chair Rail
Before you install your vertical shiplap, you’re going to want to install a chair rail. You can find the full tutorial by clicking the button below:

3
Make Your Measurements
Using a measuring tape, measure from the floor to the chair rail. You want to be able to tuck your shiplap behind your baseboards, so you should determine how long the panels need to be to do this.
Next, measure the width of the wall to determine how many pieces of shiplap you will need to cover the space.
4
Cut Your Shiplap
Once you have your measurements, you can cut your shiplap pieces to fit.
If you need to cut a piece around an electrical outlet, you can follow these steps to cut out your outlet box:
Using a full piece of shiplap, place it against your outlet, pushing it up to the chair rail. Mark the top and bottom of the outlet on the side of your piece.
Take a scrap piece of shiplap and tuck it into the groove directly above your outlet. Mark the side and left side of your outlet on your scrap piece. Then, use your scrap piece to create a template on your shiplap piece.
To cut out your outlet box, start by drilling a hole into the corner of your template to make room for your jigsaw. With your jigsaw, cut out the rectangle for your electrical box.
You may also want to add an outlet extender box to your outlet, being sure to take the proper electrical precautions.
5
Installing Your Shiplap
To install the first piece, make sure it’s flush with the chair rail and the wall before nailing it in. Once you have your board in the right place, use a brad nailer to attach it to the wall. After you attach the first piece, tuck each piece into the groove of the shiplap. Use your brad nailer in the groove to nail your shiplap to the wall, making sure that it’s flush with the chair rail before nailing. Continue this process until each of your panels are attached.
If you are installing a piece of shiplap you cut to fit over an electrical outlet, pull the outlet out past your piece and carefully insert your shiplap into the groove and secure it using your brad nailer.
6
Finishing Touches
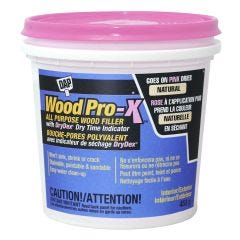
Now that you have all your shiplap pieces attached, use caulking on the seams and wood filler to cover all the nail holes.
Your shiplap is almost finished, all it’s missing is a coat of paint to bring everything together! Use a brush to paint inside all the grooves, making sure to get all the corners. Then, use a roller to go over the slats. Once everything is painted, your vertical shiplap is complete!

-
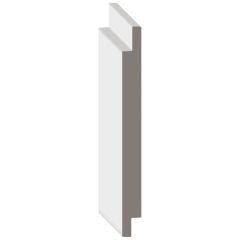
 Alexandria Moulding1/2" x 5-5/16" x 8' Primed MDF Shiplap PanelRegular Price$14.99Special Price$11.98
- Ready to Ship
- 370 Available for pick up at
-
$17.09
- Ready to Ship
- 0 at
-
$20.99
- Ready to Ship
- 1 Available for pick up at
-
Starting at$34.99
-
$5.29
- Ready to Ship
- 41 Available for pick up at
-
$19.49
- Ready to Ship
- 13 Available for pick up at


Recommended Articles
-
A backsplash is like jewelry for your kitchen. The look just isn’t complete without it! If you’ve outgrown your old style or are starting with a blank slate, it’s time to try your hand at tiling! Tile your DIY backsplash with the help of our Project Centre and give your kitchen a facelift.
-
Wooden exposed beams can give your home a subtle rustic touch and a cozy vibe. This highly sought-after architectural feature can be easily replicated with an easy DIY and you can add faux wooden beams to your ceiling! By using a nice wood stain, you can make your faux beams look like reclaimed wood, which will add even more character to your space!
-
A chair rail can be used for a number of different wall treatments, such as wainscotting, shiplap, or you can use it to separate two different paint colours on your wall. In this DIY, we are going to show you how to install a chair rail, then you can get creative with what you want to pair it with!
-
In this how-to, we are going to show step-by-step how to install a prehung door. Prehung doors come ready to install and you will be surprised at how easy it is! Adding a new door to your living space is a great way to freshen up your home and give it a new style.


