Summer of DIY: Driveway Sealing
Improve the look and safety of your driveway by sealing cracks, holes, and more. Follow this sealing project to increase your driveway's lifespan. Prevent water, ice, and snow from seeping into your driveway and causing more damage. The best part? It's budget friendly!
*This project was done in partnership with Denika Coakley. Instagram: dc_woodworks
What do I like most about this project? As a DIY-er I have often spilt things on my driveway, that's where I often work. Most things come out. But this white spot is an oil base primer that I have been on there for years. It has completely disappeared! *Now I need to find a new workspace because my driveway looks too nice to work on!

1
Gather the Necessary Materials and Tools
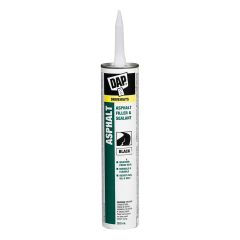
Driveway sealant: Choose a quality sealant appropriate for your driveway type (e.g., asphalt or concrete). You can find it at your local KENT or at KENT.ca .
Cleaning materials: You'll need a broom, a high-pressure hose or power washer, and a cleaning solution suitable for driveways.
Patching compound: If your driveway has cracks or potholes, you'll need a patching compound to fill them.
Applicator tools: Get a squeegee or brush for applying the sealant.
Safety gear: Wear protective clothing, gloves, and safety goggles.
Prepping your driveway is crucial for the success of this project. Not only does your driveway need to be free and clear of debris but it needs to be 100% dry as well. Oil and water don’t mix.
You can also clean your driveway using a leaf blower and blow all debris away or you can use a push broom and start in one corner and push away all loose dirt and rock. Make sure your driveway is 100% dry. If you see dark spots on it that look wet, do not start the project.
Tip: If you don't have a leaf blower, did you know you can use a shop vac in reverse? Cool, eh? It works the same way!

2
Repair Any Damage
Inspect for cracks and potholes: Check your driveway for any cracks or potholes that need to be filled.
Patch the cracks: Use a patching compound or suitable filler to repair any cracks or holes in the driveway. Follow the manufacturer's instructions for the specific product you are using.
Please allow the patching compound to dry: Give the repaired areas enough time to dry and cure before proceeding.
TIP:Mow your lawn and trim the edges of the grass near the driveway before you start your project for a better visual of the line between driveway and lawn.

3
Shake It Out
A driveway sealer is used in our warm months, which means the cans sit and separate during the winter (no problem! It's a quick fix) Before you take the lid off for the first time, put the can on its side and roll it back and forth several times. Rolling it back and forth will allow the bottom to shift around inside the can and start the mixing process (it is quite thick).
Once you have rolled the can several times and can feel the bottom shifting around inside, now you can take the top off. Use a stiff stir stick (wood or metal) and stir stir stir. Make sure you have stirred the sealer so it's consistent. Making sure the sealer is fully mixed will ensure consistent color.

4
Apply the Sealant
Check the weather forecast: Ensure you have a few consecutive dry days with no rain in the forecast, as rain can ruin the sealant application.
Start at the edges: Begin applying the sealant along the edges of your driveway using a brush or squeegee. Work in small sections to ensure even coverage.
Fill in the main area: Pour the sealant onto the driveway, then spread it evenly using the applicator tool. Work in a back-and-forth motion to cover the entire surface. Apply a second coat if recommended by the product instructions.
Be careful pouring the sealant on the driveway the first time because it will splash up and you don’t want to get it on anything, especially your home! Make sure you have some soapy rags on hand JUST in case this happens.
Be cautious of drying time: Allow the sealant to dry completely according to the manufacturer's instructions. It usually takes a day or two, but it can vary depending on weather conditions.
Using your squeegee, move the liquid sealant around the driveway by applying a small amount of pressure. The pressure helps with keeping the sealant even and not too thick.
If you see what looks like a puddle being left behind, just go back over it to thin it out. This product is quite easy to work with, and you will find your own groove! It dries matte, so there's no need to worry about your application pattern.

5
Clean Up
Clean your tools: Thoroughly clean your brushes, squeegees, and any other tools you used with soap and water before the sealant dries on them.
Dispose of waste: Follow the local regulations for disposing of any leftover sealant, cleaning solution, or other waste materials.

6
Drying and Maintenance
You're able to walk on this in just a few hours. Park your vehicle at the end of your driveway so people passing by know not to step on it.
Maintain your driveway: Regularly sweep your sealed driveway to keep it clean and remove any debris that could potentially damage the surface.
Remember to read and follow the instructions provided by the sealant manufacturer for specific guidelines and safety precautions. Sealing your driveway can be a rewarding DIY project, but if you have any concerns or doubt your abilities, consider consulting a professional for assistance.
Now go grab a lemonade! Enjoy that fresh paved look.
Need help with your project? Our Project Centre team is ready to answer all your questions, no matter how big or small your project is. Consult our Project Centre today to find the perfect solutions in your budget!

Recommended Articles
-
Outdoor space is a must for Maritime summers! Whether you have a small balcony or sprawling grove in your yard, the extension of your home deserves to be your favourite space for morning coffee, family time, and outdoor games. Our Project Centre pros can help you DIY all the decor, furniture, and greenery you need to transform your outdoor space from “meh” to “amazing”!
-
Looking for an inexpensive way to make your home look sleek and modern? Refresh your door with KENT. Your front door sets the tone for your home. Refreshing your door can help make a bold statement that ties everything together.
-
Why be like the rest when you can stand out? Modernize your address sign and spruce up the outside of your home. Not sure where to get started to create your one-of-a-kind address sign? Check out these tips and tricks!