How to Tile Backsplash
A backsplash is like jewelry for your kitchen. The look just isn’t complete without it! If you’ve outgrown your old style or are starting with a blank slate, it’s time to try your hand at tiling! Tile your DIY backsplash with the help of our Project Centre and give your kitchen a facelift.
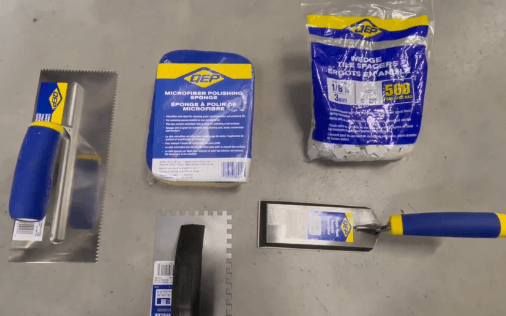
For This Project You Will Need:
1
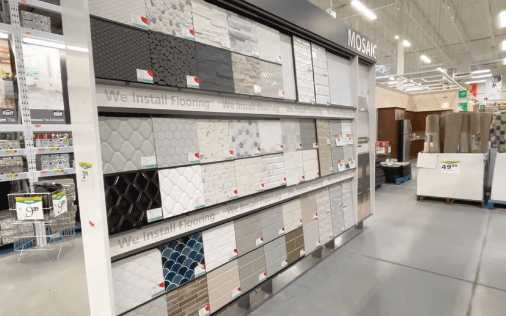
Choose Your Tile
The first thing you want to do is decide what type of tile you are going to use to create your backsplash. No matter which tile you choose to install, the steps will all be relatively similar. If this is your first time installing tile, we recommend you go with a smaller subway tile, or something around that size. Browse the tile options below that KENT has to offer!
TIP
You will need to determine how much tile you need for your square footage. It is a good idea to purchase an extra 10% more tile in case you make any cutting mistakes. Having extra tiles on hand will also come in handy if you ever need to replace any in the future.
-
Starting at$149.08Regular Price$229.35
-
 Starting at$43.12
 -
 Anatolia Tile & Stone2"x6" Earth Bliss Element Brick Mosaic Tile 10PC/10 SqFt/BoxRegular Price$137.50Special Price$89.38
- Ready to Deliver
- 48 Available for pick up at
-
 Anatolia Tile & Stone12" x 24" Volakas Grigio Mayfair Porcelain Tile 15.5 SqFt/BxRegular Price$61.69Special Price$52.44
- Ready to Deliver
- 8 Available for pick up at


2
Prep Your Space
Cover your kitchen counter with a plastic sheet to protect it from any tile adhesive or grout. You will also want to turn off power to the room and disconnect any appliances in the area. Be sure to remove any outlet covers.
Remove any existing wallpaper or tile, and you can patch repair your drywall if there are any rough or uneven spots. Any bumps on your wall will lead to uneven tile, so it is important to ensure you are working with a smooth surface.
Now you need to determine where you are going to start your tile. A good tip is to start at the focal point of your wall, as this will look the most natural regardless of the layout. Pre-lay your tile to determine where spots for outlets and edges will need cutting.
3
Tile Installation
First, you want to mix your tile adhesive. For most tile types such as glass and stone, mortar is the best choice for tile adhesive. However, if you decide to go with ceramic tiles, you should use mastic, which is a premixed tile adhesive made specially for premium ceramic tiles.
Once you have your tile adhesive ready to go, spread it on the wall evenly using your trowel. You can also use a technique called “back buttering” by spreading the adhesive onto the back of each individual tile, then placing it on the wall. This technique will strengthen the bond between the mortar and the back of the tile, but it is not required.
Now you’re ready to start placing your tiles on the wall! Start by placing your tiles on the bottom of the wall where it meets your counter. It’s important that you use spacers in between each tile to ensure there is an even gap. Continue placing your tiles using spacers, until your desired area is covered. You can also go over the tiles with a grout float to ensure that everything is even. Once your tiles are all placed, let them sit for at least 24 hours to let the mortar dry.
4
Applying Your Grout
Once your mortar has had enough time to dry, you can start applying your grout. First, remove all the spacers from in-between your tiles. You should also clean your tiles with a damp sponge before applying your grout.
If you are mixing your own grout, you should be aiming for a pudding-like consistency. If you are buying it pre-mixed, all you need to do is open up the bucket and start applying it!
Using a grout float, apply it evenly between the spaces of your tile, working with smaller sections at a time. Use a damp sponge to clean up the tiles.

5
Enjoy Your New Backsplash!
After the grout has set, give your tiles a final polish with your damp sponge to clear any remaining grout haze. Apply a thin line of latex caulking where your tile meets the counter for a seamless finish.
Once your tile backsplash is complete, this would be the time to install any outlet extenders if you need them. Replace your outlet covers and turn the power back on.
That's all it takes to have a beautiful tiled backsplash! Now you can sit back, relax, and enjoy your kitchen's new style.

Recommended Articles
-
There are hundreds of hues to choose from when it comes to painting, but your paint choice includes so much more than the colour! The type of paint best suited for your project should first depend on its formula and durability, then its finish best suited to different spaces, and third, any special requirements for craft paints, spray paint, or furniture paint. For smaller creative projects & DIYs, there is a rainbow of options and finishes like chalk or metallic you won’t find in wall paint choices. No matter where or what you’re painting, our Paint Buying Guide and KENT experts can help you find the right paint for the job!
-
Countertops are a key ingredient in your dream kitchen! Make the best choice for your home with our handy guide and avoid counters that can’t take the heat. Shopping for your price range, utility, and style will be easier than ever with help from the KENT Project Centre! Find your new KENT countertops today and make your kitchen a space you love to use.
-
Kitchens are without a doubt one of the most used spaces in any home. From cozy dinners to classic kitchen parties your kitchen needs to serve up high function and style every day of the week. One of the largest components of any kitchen redesign will be your cabinets! Choosing the foundation for countertops, appliances, and hardware is no easy feat, but the KENT Project Centre is ready to help you find the perfect cabinets. It’s time to stop trying to make poor storage and style work, and create a kitchen that works for you!
-
Few things compare to the joy of comfort food, but if your cooking area lacks that Pinterest-worthy charm, why not give it a makeover? Luckily, numerous kitchen elements can be effortlessly enhanced to transform your kitchen into a functional and aesthetically pleasing area. Whether you're adding new features, giving it a fresh coat of paint, or making replacements, our Project Centre is here to assist you in discovering all the guidance and equipment required for your DIY kitchen project!