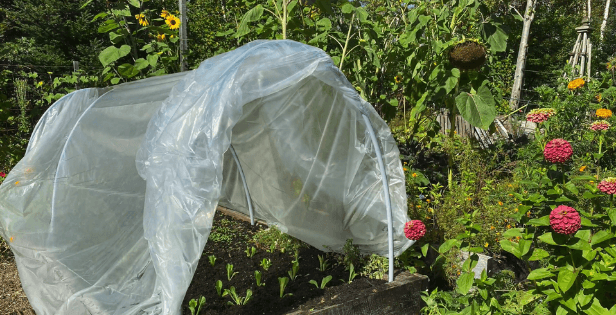
How to Make a Mini Hoop Tunnel
Enjoying fresh vegetables and herbs from your garden doesn’t have to end as soon as the cold weather comes around. By creating a hoop tunnel, you can protect your plants from the cold and keep them thriving throughout the fall. In this how-to, we are going to show you how to build a mini hoop tunnel that will protect your garden from the frost.
Project Overview:


Note: The time-commitment, cost, and materials represent creating a mini hoop tunnel for a 4’ x 8’ garden bed. This tutorial is only meant to act as a guide and may vary based on individual skill level.
Materials:
| ½ inch diameter PVC conduit, 10-foot lengths |
| 25’ x 120” clear plastic sheet |
| 2-foot long rebar stakes (optional) |
| Clips, rocks, etc., to hold the plastic sheet in place |
How to Build a Mini Hoop Tunnel:
1
Building the Frame
For a raised garden bed, insert the PVC conduit into the soil at the end of the bed. Bend the flexible conduit over the bed and push the other end into the soil on the opposite side. Push each end at least a foot deep into the soil to make sure the hoop is well-secured. This will give you a hoop over your garden that is about 3 feet tall in the middle.
For an in-ground garden, pound some rebar stakes into the ground about 4 feet apart on both side of your garden. Then, insert the ends of the PVC conduit over each stake. This will give you a secured hoop over your garden.
Repeat this process with all your PVC conduit until you have created a frame over your garden.
If you want to build your own raised garden bed, check out our blog post to learn how. Want to know how to plant in your raised garden bed? We have a blog post for that too!
2
Creating your Mini Hoop Tunnel
Using the clear plastic sheet, unfold it and place it over your frame, ensuring that it’s evenly covering your garden bed.
Secure the plastic sheet by using clips to attach it to the hoops, or you can weigh the edges down with rocks, sandbags, or other heavy materials. Be sure to avoid using anything with sharp edges so you don’t puncture the plastic sheet.
It’s important to make sure you open the ends of your mini hoop tunnel daily to lent it vent and prevent any heat build-up. Once the temperatures are cool in mid to late autumn, the tunnel can remain closed. Make sure you water your plants often to provide a consistent supply of moisture.
Take a look at the finished product!


